Tuesday, February 5, 2013

Oak auction 2

Now it's Tuesday already and I'm still sealing this top. I can't believe how much epoxy it's soaked up. I think it's close to saturated. I hope! I've also sealed the finished base parts with lacquer so they are ready for install as soon as I get this top done. Aside from the epoxy it still needs a lot of TLC. The live edge needs a good clean up, the whole thing needs sanding and a clear top coat. Always more work than I think it is.
Here some pictures.

I had to Bondo the bottom because the tape didn't hold the weight of all the epoxy and I had a major leak!  

The bottom filled and sanded. Notice the large black epoxy pool?

...and another fill. I haven't even gotten to the small cracks.

Figured Teak base and legs sealed.


Sunday, February 3, 2013

Oak auction


Well it's been a while since the last post. We've been busy with the house remodel and the holidays. My parents were here for Christmas and New Years. It was wonderful to see them again and they really enjoyed Max. Ed moved back to Puerto Rico because he couldn't find a job! Tough times.
Other than that things are the same and time flies by as always.
So here to the new project: Every year Max's school has an annual auction party where the families donate everything from Opera tickets to iPhones. This year I decided to build something instead of buying another kindel or concert ticket. When the school recently completed a brand new state of the art addition including a full theater and gymnasium they had to cut down a huge 200 year old white oak tree! I was fortunate to stumble across a slice of this tree one day while volunteering at the school. I contacted the office, explained my plans and got the approval to create something for the auction. That was 6 months ago and now it needs to be done by Valentines Day for the catalog! There is no sugar coating it! My dad is right. I am a procrasinator. I think some people just don't get it. I think I'm one of them...
Anyway, I started last night, worked all day today and got a good amount accomplished.

This is the small part of the slice that broke off and I won't use due to lots of rot. Here you see how thick this thing is... and it's heavy!


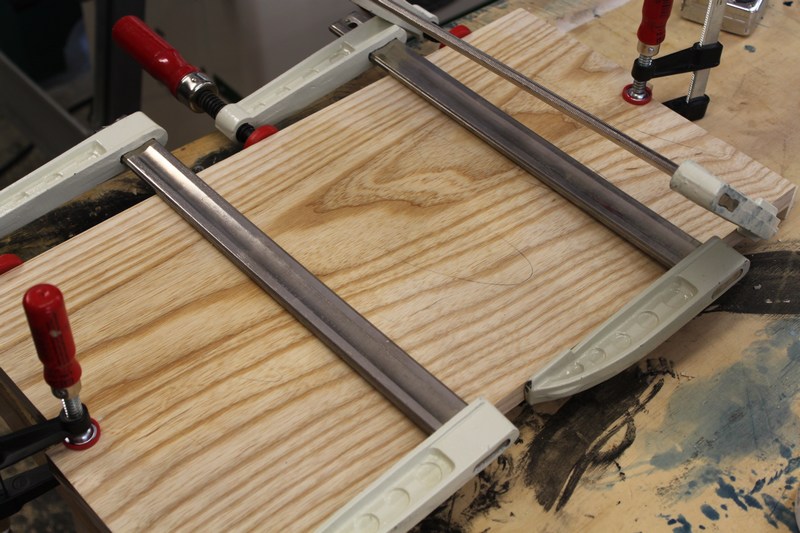
Here I made a quick flattening jig out of left over plywood. Next time I'll make the sides on the actual jig at least 3" tall for less sag.

Set up and ready to go.

That's a lot of wood to remove!


First pass...
...and second.
It took me an hour to clean up the dust and wood chips from flattening this piece!


One side done. Still a little high but dry...

Ready to cut the rot side.

I haven't decided on a base design yet. Still playing around with ideas...


Milling part of the base.

The other part...

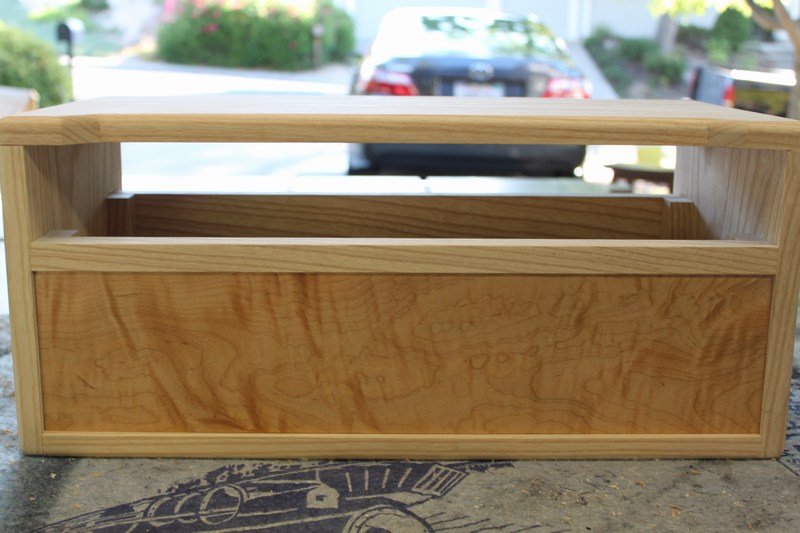
Here I'm prepping for the veneering process. The base I'm using is an old 1 inch pine board that Ed brought on board when he stayed with us and a few old 4x4's I have kicking around. The veneer is quarter sawn figured teak.


Veneering the base.


Now it's time to prep for the epoxy to fill the cracks.


I use West System Epoxy from West Marine. This stuff is great and it has the nifty pump dispensers but it's also very pricey.

Jesus... this is going to take more Epoxy than anticipated! I might have to make another run to West Marine. But not tomorrow because the Niners are going to win the Superbowl:-P Homebrews, ribs and wings. I can't wait. Now it's off to Sushi and let this stuff kick.
   

Sunday, August 19, 2012

Amp case out the door


Lobster baby lobster! Wow did I not expect that. I wanted red and I got lobster. Mohawk stock alcohol red stain. This is not red! It sure looked more red on my test piece. So now I wanted to tone it darker but I ran out of red. This project needs to be out of my hair today and out the door early next week so I better come up with something quick. I added blue to the sealer and toned it until I got a maroon. But now the orange maple front didn't match at all. (actually nothing will match that hideous color:-)
Sand it down stain it black and call it a day. Spook can change it to a different color down the road or even swap it out for a more consistent or figured piece. For now it's gonna have to do. All it needs is the amp, corners, the handle and feet. It's a wrap.
Here are the pictures:
Holy shit! That color is insane! Kind of cool though too...


This is the stained and sealed maple front. It almost has an amber tone to it. It's the stock red from Mohawk. Bizarre.
Here's the final product. I can't say I'm super happy with it but I saved it from Mr. Crabs that's for sure:-P  I can look at it and say that's pretty cool. Enough for me to get my 8 hrs of sleep if you know what I mean.


This thing will definitely look nice on a Black cabinet.
Here's the back.

Wednesday, August 15, 2012

Amp case build 2

I had an hour to kill today after work so I finished the back and made a color sample. It turned out pretty good but I think I will try to tone it as well after it's stained to get that really consistent deep dark red that I'm looking for. Hopefully I'll have this thing off to Spook by the middle of next week.
Quick router jig.

Routing out the inside.


Here the finished back for ventilation.


Here is a first color sample for the shell itself. It's not bad but I still find it a little to bright. This would be good for the maple front. I'll give it another shot Friday with some color in the sealer. Then again spook might like it this bright. 

Monday, August 13, 2012

Amp case build

Believe it or not I had a chance to start another project. My buddy spook needed a shell for his new amp he bought (some wild clone of this 50K amp) so he asked me to build him one. It took me a total of 8 hrs to complete the build but I know the finishing will take up most of the time. I refuse to just build something and send it off unfinished! I like the finishing process (when it goes right) and I get great satisfaction out of just feeling and looking at the finished product before it goes to the client.
The original plan was to build it with plywood and solid edging like I did with the 2x12 speaker cab but quite frankly I just didn't want to spend the time! (Sorry spook you're just gonna have to cough up the $50 for the stick of lumber)
The shell is made of solid ash and the front is a piece of 1/4" wild figured maple I had laying around glued on a 1/2" piece of white oak. All it needs is the vent cut out in the solid back and it's ready for finishing. I've been playing around with some colors but I haven't had any luck. The ash takes the water base black excellent but it has trouble with the alcohol base stains. I think I might have to bite the bullet and spend the $20 to get a good water base dye! I was thinking a purple front and a blue shell. Maybe even an all blacks shell with a purple front. But before I do that I better ask the guy who'll be looking at this thing for a while! Here's the progress:

7' by 12" 4/4 solid ash.

Milling the lumber.
I had to rip, mill and glue the sticks back together because my planer width is only 10 inches! But my jointer width is also 10" and that is worth every dime I spent on this combo machine! I use the 10 inches on the jointer way more than the planer.
No way you can see the joint when I'm done!
Cross-cutting the sides, top and bottom.
Gluing up the front corners.
Did I mention I love drinking beer? It has really been a while since I had a Boston lager and I must say I was pleasantly surprised! I've been on a porter/stout crave lately and this light malty Vienna lager was delicious on a summer afternoon working in the woodshop at 98°F!
Gluing the shell together with biscuits. Don't get me started on dovetails! If you have a dovetail machine good for you. If you don't and do them by hand, I wish I had your time! The first time I did dovetails by hand was in Germany in the early 90's in my cabinet making apprenticeship. I swore to myself then I will never do dovetails by hand again and I never did!
My name is Ed and and that's some funny ass lumber...
Finished amp from the back. Just needs the cut-out.
Front with the maple insert.
Same just wet.