Thursday, May 8, 2014

Silicon Valley

This is my latest CNC creation. The hairpin Silicon Valley circuit board USA table. My original plan was to make a small run and sell them online with a few different colors and wood species available. All CNC. Easy right? Wrong!
So usually I start projects, finish the prototypes and move on but I felt pretty strong about this one. Unfortunately I ran into the same problem over and over again. I wasted a lot of material on this project! The issue was cross grain tear-out. I used every different type of veneered plywood and 3 different V-bits sharp out of the box. I also experiment with different feed rates and spindle speeds on the CNC to no avail. The circuit board detail is v-carved with a small 60 degree V-bit. It cut very clean moving along the grain but the big problem was going against the grain. No matter what bit, speed or feed rate it tore out. It was very small but enough to notice once the circuit board was colored or even just clear coated. So long story short this here is one of the prototypes. The reason why it's so dark is because I hid some of the small tear-out along the end grain just to salvage this top. I stained it and toned it heavily. After throwing sheet after sheet in the bin you just want to keep something for your own peace of mind.
I haven't given up yet. My plan is to try screen printing the circuit board onto the top. Mel and I have  already taken a screen printing class. I got distracted and made Max some Minecraft shirts the other day instead of working on a huge circuit board screen but that's OK.
Here are the pictures of the table:


Tuesday, February 25, 2014

Entering a new world!

Well lots of things have happened over the last 6 months. We moved back to San Diego from the Bay Area and I already miss our house and my shop even more! We are cramped into a two bedroom apartment with two storage units. That is nuts!
With that said, not having a creative outlet I looked for some shared shop space but to no avail. I did however find a place called the Maker place. (www.makerplace.com) This was a blessing. The shop is huge and has every possible tool you can imagine, but being a professional cabinetmaker I must say that the wood shop tools are somewhat beat with a lot of dull blades. But you still have an entire shop you can use for personal or business projects. They also have a full spray booth, metal shop, industrial sowing area, plasma cutters, laser cutters, 3D printers and the list goes on. What caught my eye was the wood CNC machine! I took two classes and now I design and experiment with the CNC router in mind. This is opening a whole new world for me! I always thought this was way to complicated but the truth is with today's software advances it's actually pretty easy. And it's one of the safest tools in the shop as well. Who knows where this will go but today I had the morning off so I started on a prototype coffee table top. Here are the the pictures:


First draft on the computer. The plan is to use solid wood or ply and fill the letters with
black epoxy, sand it flush and seal it with satin conversion varnish. For the prototype
I used 3/4" MDF with beech veneer.

Cutting the outer shape. This is the first time I used this machine and it
took me less than 20 minutes to set it up! It's not that hard.
Finished shape with tabs removed


Final top with v-carve letter cutout. The total cutting time was 50 minutes. Add changing
the cutters and setup brings it to about an hour and a half.


Time to spray black primer into the letters before sealer and finish.
 The original plan called for black epoxy sanded flush but that would have
cost to much for this project prototype. The plan now is to silkscreen the letters
or images onto the top instead of v-carving it. I have a class on that in April.
I really do like the v-carved letters but they're a dust trap for a tabletop. I might
make a few wall decorations with the v-carved letters. We'll see. 
 
The black primer has been sanded off and the whole thing got two coats of sealer.
Last but not least it needs a few finish coats and the  legs. Final pictures soon...


Sunday, February 23, 2014

Quick table from scrap

Here are a few pictures of a quick table I built with leftover cherry from a kitchen project.
It was cold outside and my varnish was drying very slowly so I had some time to kill. Nothing special. The casters actually make it really easy to move around while vacuuming.
Clear cherry with satin conversion varnish.


Wednesday, August 7, 2013

Last one out the shop...

So this will be the last project out of my shop not dedicated to the house. (We are moving back to San Diego at the end of the month) It took me close to a year to get it set up:-( I will miss it. Learned a lot of new things here. Oh well, all good things must come to an end. Off to a new start and adventure. Like Melissa said: " a facility well used." I will post the link to our house once it goes on the market.
John, a great craftsman and also a long time guitar and bass player who's helping us out, hit the nail on the head: Why do we always fix up our homes right before we move? Sound familiar? Must be part of this buy a house sell a house cycle.
Enough about that...
Before we knew we would move I stripped my Mesa head planning to build a new custom case. Once I found out we re moving I new I had to put it back together or I would lose the parts. I know how this goes. I didn't have time to build a new case but I could strip it, re-tolex or refinish it. I don't like tolex much so decided to refinish it. I primed it, primed it again, filled holes, primed it, filled holes and so on. It was tough since it was plywood and not MDF. Then I color coated it, clear coated it with urethane and finally rubbed it out. I made a new face plate out of 1/4" curly maple on 1/2" MDF stained blue, finished and rubbed it out. I ordered new feet and a new handle. Turned out pretty good considering what I had to work with. There are a few things I'm not to happy with but that's what happens under crunch time. Here are the pictures:

Old...

Old  ass backside.

Old with no tolex... This was a lot of work. Old  plywood, holes everywhere and glue glue glue

Yeah I can tackle this...

Sanded and rubbed out.

This is the curly maple board I used for the guitar and the blue Mesa front piece.

Faceplate close-up

Faceplate installed:


This florescent light sucks!


All back together except the handle and feet. They're in the mail. Amazing what a good camera and some lights can do!

How nice is that hand scraped birch floor? (hand scraped by who... Dutch flooring elves?) We installed this in almost all rooms of our house. I cut it and Mel stapled it down. Looks great and is cheap. $2.49 a sqft. You can't beat that! The tongue and grove are rough though so be prepared to say the f-bomb frequently...

Close up of the maple. Book matched it from center left to right. Check the reflection of the knobs on the 1/8" round over on the bottom piece of the face plate. I dropped the finished piece while installing it on the concrete garage floor! It landed on the back edge, bounced and landed on it's back. I stood there silent with my mouth open, picked it up, inspected it and couldn't fucking believe it. Not a dent or scratch on the glass smooth highly polished face! The Dutch maple fairies must have been looking over me! ( I think they go drinking with the flooring elves) That shit NEVER happens:-) Finals with handle and feet will follow shortly.

Wednesday, July 17, 2013

From this to that...

Well it's been a while and I still haven't posted the final pictures of the teak/redwood table I've made for our living room. It's done and looks great. I will post pictures soon.
In the mean time I've already completed the next project and I've started another one that will be done this weekend. I just haven't had the urge to share anything lately. Strange how the brain works. For months there is nothing and then today lets show 'em what I got... I blame all this on my ADHD! I love it and I hate it at the same time. Oh well.
So there is A LOT of news in our life and big changes coming soon... and I mean real soon. But more on that with the next project. (which will be soon) Now to this project:
My good friend and ex band member Spook inspired me to build my first guitar cab which is the first post ever on this blog. He actually got me started on blogspot. Way back he used to come into Evans shop after-hours and work on his guitars while Evan and I would work on our personal furinture projects. Now 6 years later he's got his own business and makes guitars for people from CA to Australia. Long story short... my turn to build a guitar. It's been on my mind for a loooong time and that time has come. So I decided to make a Fender style Telecaster for my sons 7th birthday. For about a month or two I did all the research I could on building guitars. Especially Telecasters. From Google to Stewmac to Borders and Ron Kirns detailed Tele build! Give me anything you got on that subject. And last but not least... the most useful and important... my boy Spook. I can't tell you how many times I called him to milk his brain. It reminds me of the time I used to call Kel from the beer store in Berkeley at midnight and ask him why my cooled wort wouldn't drain from my boil kettle! He just like Spook always helped me out with his personal tips and tricks! I myself find great satisfactory in passing along what I've learned over the years and I know spook does too, but a few times I could tell it was a little much;-) If I was going to put all this time and effort into a project I wanted to do it right! There are so many new tools and techniques that come into play when building a guitar. There are so many new things I learned and also learned how not to do. The internet is a wonderful research tool no questions asked, but if it wouldn't have been for Spook this build would not of turned out the way it did!
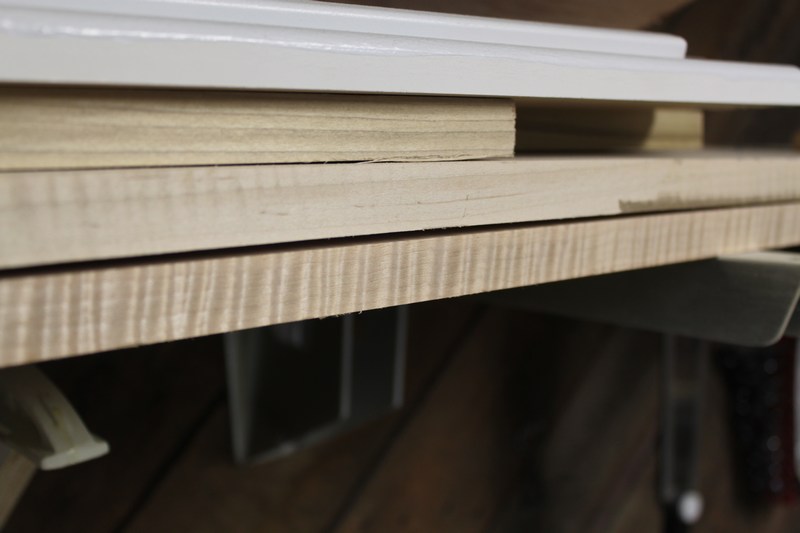
So with all this long bla bla bla here are a few pics from the raw blank to the finished guitar. I did not document this build just because I was so focused on doing it right I didn't even think about taking pictures. I did mess up on the bridge pickup rout but other than that I'm happy. The next one is for me:-)
The neck is leveled and crowned, finished with nitro and the body is mahogany with a maple strip and curly 1/4" maple top. Finish is Urethane. Pickups are Ken Armstrong and Dimazio DP381. She still needs a final setup and then it's in the case for Max to unpack on his birthday:-) Here is the blank it started from to the final guitar. This took a long time:


Monday, April 1, 2013

Figured Teak Redwood Coffee Table

A few months back I helped a friend of mine build a deck in Martinez. At the end of the project when it was time to clean up he sent me to the dump with all the demo lumber. That's where I looked a little closer and found a few very nice old growth 4 X 6 Redwood beams. Lots of nails and paint but just looking at the end grain I knew this was worth keeping. We've been in the need of a coffee table in our living room for a while so I finally broke into the Redwood. The top is part of the figured Teak I've had for a while veneered on 3/4" MDF. The design is on the fly, as usual. Here are the first few weeks:

Here the top and the rough redwood lumber.


Original Stamp.


Milling the table legs.


Table leg jig.

Cutting out the profile.

Time to clean up the rough band saw cut with the jig.

Final sanding before finish.


Since this is reclaimed Redwood I want it to look that way after milling and shaping it. A good way to do this is to oxidize the wood just like it does naturally. To do this i mix vinegar with steel wool and let it sit for a week. Then I apply it with a lint free rag just like stain. It oxidizes immediately.  

The dried oxidized weathered look with no finish.

Here the legs have a coat of oil finish. No finish on the legs looks more realistic but i like having some protection on my lumber and depth as well. 


 This is the teak top with a coat of sealer.


Time to cut the dado in the redwood legs with a slider on the table saw.


Since all the parts were finished I taped off the exposed edges with painters tape and epoxied
the legs onto the tabletop.