Monday, August 13, 2012

Amp case build

Believe it or not I had a chance to start another project. My buddy spook needed a shell for his new amp he bought (some wild clone of this 50K amp) so he asked me to build him one. It took me a total of 8 hrs to complete the build but I know the finishing will take up most of the time. I refuse to just build something and send it off unfinished! I like the finishing process (when it goes right) and I get great satisfaction out of just feeling and looking at the finished product before it goes to the client.
The original plan was to build it with plywood and solid edging like I did with the 2x12 speaker cab but quite frankly I just didn't want to spend the time! (Sorry spook you're just gonna have to cough up the $50 for the stick of lumber)
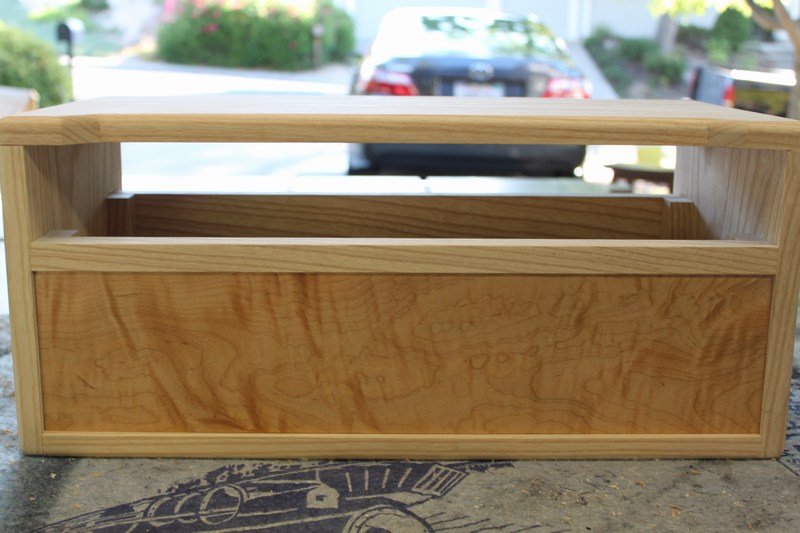
The shell is made of solid ash and the front is a piece of 1/4" wild figured maple I had laying around glued on a 1/2" piece of white oak. All it needs is the vent cut out in the solid back and it's ready for finishing. I've been playing around with some colors but I haven't had any luck. The ash takes the water base black excellent but it has trouble with the alcohol base stains. I think I might have to bite the bullet and spend the $20 to get a good water base dye! I was thinking a purple front and a blue shell. Maybe even an all blacks shell with a purple front. But before I do that I better ask the guy who'll be looking at this thing for a while! Here's the progress:

7' by 12" 4/4 solid ash.

Milling the lumber.
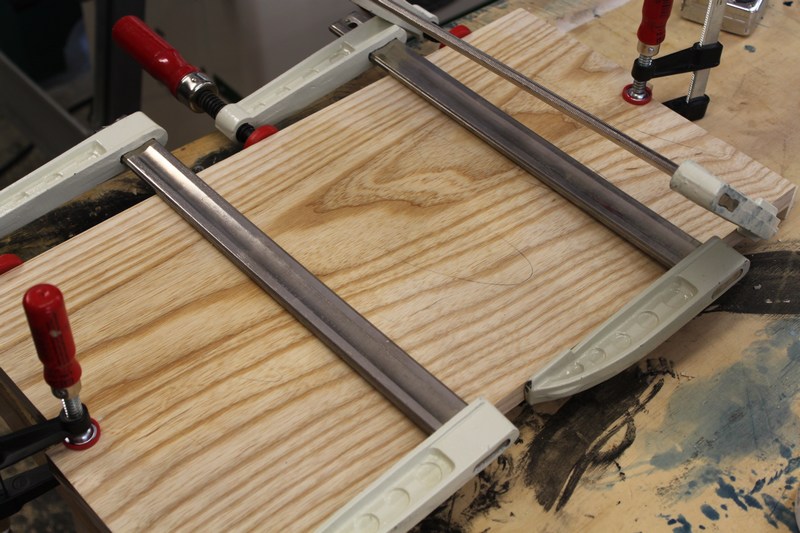
I had to rip, mill and glue the sticks back together because my planer width is only 10 inches! But my jointer width is also 10" and that is worth every dime I spent on this combo machine! I use the 10 inches on the jointer way more than the planer.
No way you can see the joint when I'm done!
Cross-cutting the sides, top and bottom.
Gluing up the front corners.
Did I mention I love drinking beer? It has really been a while since I had a Boston lager and I must say I was pleasantly surprised! I've been on a porter/stout crave lately and this light malty Vienna lager was delicious on a summer afternoon working in the woodshop at 98°F!
Gluing the shell together with biscuits. Don't get me started on dovetails! If you have a dovetail machine good for you. If you don't and do them by hand, I wish I had your time! The first time I did dovetails by hand was in Germany in the early 90's in my cabinet making apprenticeship. I swore to myself then I will never do dovetails by hand again and I never did!
My name is Ed and and that's some funny ass lumber...
Finished amp from the back. Just needs the cut-out.
Front with the maple insert.
Same just wet.


Friday, August 10, 2012

Finished cab

It's finally done! I ended up using different speakers and exchanged the white piping with black. I just couldn't get used to the white. To bright! O and don't use the cheap piping. Spend the few extra bucks and get the good stuff! Installing this thin garbage is a nightmare. We hooked it up to the Mesa and it sounds great. First I wanted an open back but after some research I decided against it. I used the Mesa Lonestar cab dimensions and it's really bottom heavy for some reason. 
Any who, Now that this dark blue white oak custom cabinet is done and I look at my Rectifier sitting on top, it looks pretty shabby! I think it needs a matching shell. We'll see. First I need to finish the trim in the gray room, then a vanity side job and spook wants me to build a shell for an amp he just got. I think I'll use the left over ply for that with a nice dark red/black finish. And then it's time for Mel's esthetician room. So it'll be some time until I get to the Mesa head project started. Always good to have plans...


These are the speakers I ended up using
Speaker installation.
Wiring.
Two-row barley and all Amarillo hops! Aww man what a delight! I highly recommend watching how beer saved the world! Watch it here for free.
Finished cab with the black piping.
La misma...
Black gives way to blue.


Tuesday, August 7, 2012

House speaker and grill cloth build

It's been a few weeks and I finally got most of the speaker cab done. It all went fairly good but I did loose interest and that shows in the speaker cloth and the piping! Oh well. It's just for me. All that's left is installing the baffle and speakers. Then I will record some sound bites and post it on here with final pictures:

Quick circle jig for the router.

Baffle cut-out
Finished baffle.
Grill cloth frame.
Grill cloth installation.
Speakers.
Finished cab.

Wednesday, August 1, 2012

More finishing

Today Mel was at school and Max out to dinner with grandpa so I had time to tinker around with the finish. I must say I m in desperate need of a new HVLP! You get what you pay for so I shouldn't complain! With that said it's obvious I had troubles applying my lacquer. I used to be an excellent finisher and now that I've been working at this hack job for over 3 years I feel like I'm loosing my patience and attention to detail! Sad but true. I also changed products and I'm not happy with it! Mohawk sucks. Again, I bought it out of sheer laziness in SF because I was there and didn't want to wait until the weekend to go to Dunn Edwards. Lesson RE-learned! Ridiculous.
Enough whining, I wet sanded and wet sanded and wet sanded some more. Then I mixed up some finish and gave it a final coat! No matter what you do and how much retarder you use, shooting lacquer at 96°F is a nightmare. And that at 6pm.
Next will be a final sanding with 800 and a coat or two of wipe on poly. this will hopefully give it that thin patina finish I like. It worked on the sample but you never know! Finishing has been a pain so far.
The hardware also came today which makes me want to get this thing ready for assembly even more! The handle will look great and I think I'll use the white piping with black grill cloth instead of the black piping. Spook, need 8 feet of black piping?
Anyway, here's the progress: 
Bad lacquer + bad gun = crappy finish. No thinning recommended from the factory. And they call this matte. Check the sheen in the last picture. Matte? That's insane.
Time for wet sanding...
...wet sanding with mineral spirits.
Dried off  and ready for next coat.
Second to last coat.
Same thing different angle...
Piping, feet, jack, handle and grill cloth came today. Hopefully this will be the end of it soon!
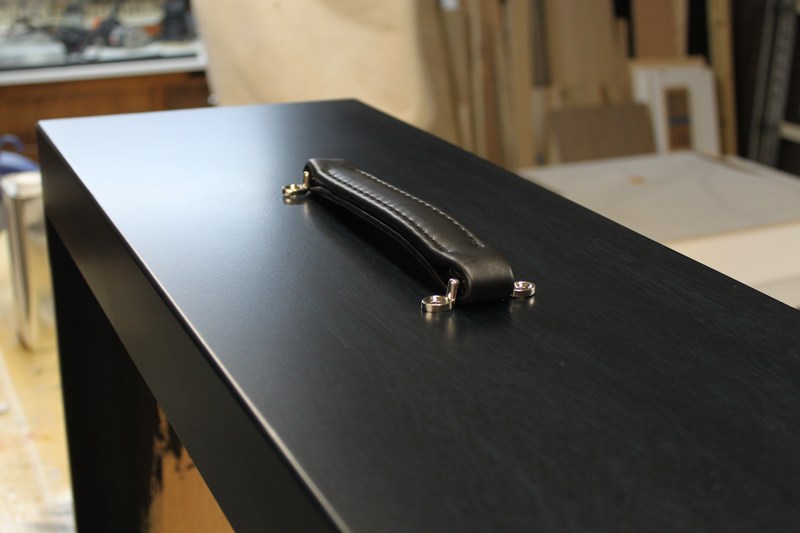
Just a picture with the handle on top. Oh and I was right about the 3/16" solid I glued to the face and back! Do you see a glue edge on the face anywhere?

Sunday, July 29, 2012

Finish time

So today I had some time to work on the cabinet. I cut and stained the front braces. Then cut, stained and sealed the baffle and gave the cabinet a final sand with 220. I didn't have anymore of my vinyl sealer I usually use so I used Deft. Big mistake! Just two coats of it and you get a high gloss finish! That's ridiculous! Never use a new product on an actual project before testing it! I knew that and did it anyway. I just wanted to utilize the little time I have to get some color and sealer on before the work week started again.  Oh well, I'll try sanding it tomorrow. Here's the progress:

Final sanding.
Black stain.
After the black dried I went over it with the Mohawk blue. It took a lot of the black off but it left enough underneath.
Mixing up sealer and getting ready to shoot. It was hot today so everything dried so fast. That can be good but also your downfall. I had to redo the back because the stain dried before I could wipe it off! Especially with alcohol stains you should always use a retarder. Lazy again.
Here is a first coat of sealer. Really brought out the blue.
Top rail of the front. Here you can see the quarter sawn ray flecks pretty good.
Quick sand after the first coat...
...and then I got this super glossy finish! Believe it or not this cab here only has two coats of sealer. I hope it sands well.

Friday, July 27, 2012

Second post with little progress

Alright so here is the second post. It's Friday and Ed and I have decided to work a little on the guitar cab and make some more color samples. Didn't do much because tomorrow is a big day. Tomorrow Max and I are going to the lumber yard in Martinez to pick up some finish for the cab, hit the batting cages and then off to the beer store to pick up grain, hops and yeast to brew a beer and play baseball. Then Sunday it's hopefully time to finish up most of the guitar cab until the hardware gets here. Here is the progress today:
Cutting the pieces for the back to glue up. Using two 1/4" pieces to get a 1/2" back.
My fancy clamp system...
Cutting the pieces for the back support.
When working with wood always drink good beer! In moderation of course! Duh!
Ed Working on some more color samples.
Installing back bracing.
Here's the back cut to size and test fitted.
Una ves mas...!

Lie to me and tell me that's not a clean crisp edge!

Wow! So this is what Ed came up with! He says he likes the red I say no way pinche guey he says no mames felipe. We'll see. I'm totally digging this blue.